The unknown resides opposite the strict plant.
Tuesday, November 16, 2010
Friday, July 23, 2010
I'm not dead, and I'm not giving up.
Work & money have put a major slow down on my passions. I need to convince myself it's worth the time away from sleep, beer & friends too use my passion to make me some money! I have a few projects coming up, and hopefully this will be picked back up again like it never left.
Even though I feel mostly like I do this for myself, I appreciate every single person who has ever read just one of my blogs. Now to get cracking on some baby burp clothes before I go to work!
Thank you, guys.
From the bottom of my heart.
Wednesday, June 23, 2010
They DO exsist!
Hi guys! I'm trying to get this done a little early today, just in case it doesn't stop storming and I lose power or something. It's freebie Wednesday! I have a whole lot of exciting freebies for you!
Okay, let's just get into these freebies!
The first freebie comes from an awesome company called The Flower Thread Company. For the price of a SASE you're going to get a free skein, a conversion chart & other goodies too! Check out this freebie here for the address and get your freebie!
Here's a link for a free idea book. I just ordered mine, are you going to order yours? Link.
Here's an awesome site for jewelry makers alike. It has lots of links, guides, ideas, and resources. Link.
This is an awesome idea for .com scrapbookers! All of their digital sets are FREE right now. Them it out here. Link.
One more freebie. It's from the Fine Art Paper company, and it's a freebie that includes seven samples. Of course, they all have photographs printed on them, but who cares? I know you can think of something to do with them, you crafters! Link.
Now for some even better freebies; I got some knowledge to lay down on you free of charge!
There are 191 days left in this year.
Today in 1926 the first SAT exam was taken.
Oh, while attempting to find hilarious/useful information in relation to June 23, I stumbled across this.
"http://www.ufoinfo.com/onthisday/June23.html"
It's a list of alien history on this day.
This is my favorite;
1994 - A woman in Miami, Florida was unable to sleep and got up at 4 o'clock in the morning to sit at her kitchen table. She saw out her kitchen window, by a large fruit tree, a tall, dark winged man-like figure. It stepped from behind the tree and glided toward the side of her house. She believed she had seen a demon.
Because, seeing a demon - yeah right! That was totally an alien.
Have a great day guys, see you tomorrow!
Tuesday, June 22, 2010
My apologies.
I'm incredibly sorry for the missed days. I'm pretty much failing at all my goals, but I had a tremendously busy weekend & I just couldn't find enough time at home. I had an open house to attend, and a fantastic Father's Day. I'm a daddy's girl. Than, I helped my mommy plant her gourds and oh! Just had a blast this weekend, and on my two days off.
Here's what I made my daddy for father's day. It's a cork board, but my mom says it's too cute to cover up!

Onto today's topic; as I am skipping Sunday & Monday because well - I skipped it.
It's Paper Tuesday! I happened to catch the Detroit Fireworks and was really inspired by the beauty in the lights, so today's theme is fireworks!
Here are some really awesome cards that I found to share with you guys.

[from top left to right: Cat Card - the 4th of July 2.00 4th of July Star Fireworks Die Cuts Set of 30 2.40 Fireworks Die Cuts 1.15 Set of Four Mini Cards - Fireworks 4.00 ]]
&& Of course here is my creation. It's a little abstract, but it's my firework. Of course if I was sending this to someone, I would put some lettering - but in a ten minute rush to finish it, all you get is the firework! Haha.


Sorry for the bad quality, all I had was my crappy camera. It looks way better than that in person, haha.
Before I leave, let's talk paper!
Like everything else sweet as hell, the Egyptians invented it. It was made from beaten papyrus to keep records. HOWEVER, the Chinese are the ones who invented the paper making process. Outside of Egypt, due to the climate needed to grow the papyrus, others used sheepskin and calfskin to make parchment. Gross! Interest though, isn't it?
See you tomorrow for a freebie!
Friday, June 18, 2010
Heyy guys! Today I'm going to show you some things I've been making this week, and how to make cute little matchbook notebooks for your friends.
Remember paper day? I made a few strawberry themed cards. They came out so horrible, I just had to share them, hahaha. By the time I got around to take pictures of them I had flecked more paint, and wiped more brushes on them than anything. Oops.

This was the best strawberry I made, and I was just doodling with my paintbrushes!

Here are a few of my decorated matchbook notebooks, and than on to the tutorial.

This one is strawberry for the theme of the week!

Okay; that's mostly what I've been making craft wise this week. Matchbook notebooks. I'm also putting together a HUGE goodie bag full of things I've been making for an awesome give-a-way. Anyways, here's the tutorial for the notebooks. They're useful at the club to hand out your number, or whatever.
take a plain old matchbook, and remove staple & matches.
 cover one side. i painted it, because that's what i had here. you can cover it in fabric, or whatever you want to do.
 Let them dry. My desk is awfully messy. It looks that like that still.
Paint the underside, and again - any color you want, or not at all. I matched it black.

Now at this point, I broke out my handy paper cutter I got for my birthday.
 &&& I folded a page into fourths and traced the matchbook from the fold line up. Of course, than I cut it out.
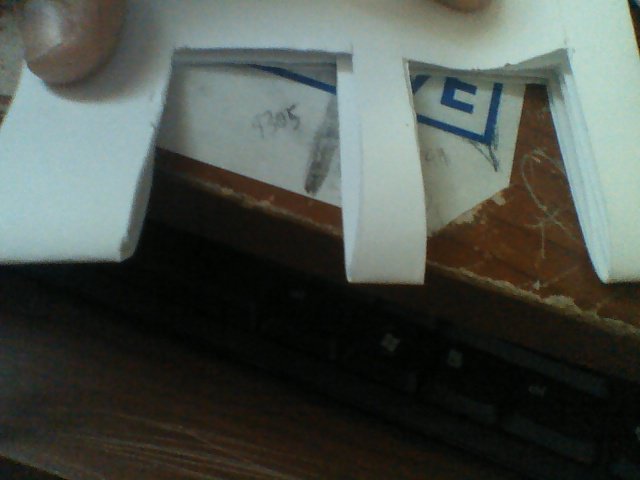
Than, I perforated!

At this point I decorated the outside, because my paint had dried. I made a lot of different ones, but all of them said "Whiskey Doodle" on them. Marketing, baby.
Okay, so now place the paper inside the matchbook JUST like the matches before.
 Now staple, and remember if you do perforate them, staple BELOW that line so that they still tear.
Here is my final one, and the ending of our tutorial.

Okay, guys. See you tomorrow for our cooking lessons! (You are teaching me something, right?) I need to go get a cigarette in me before I explode.
Wednesday, June 16, 2010
Lovers love to eat Strawberries.
Hey everyone!
I want to talk for a minute on what's up with Whiskey Doodle. This week I've been super rushed, and trying to accomplish a hundred different things. So, expect way more content and less just photos and prices. Not every week will be the same, and some weeks will be completely off the wall. As Jared and I BOTH have today off, and will be spending it at the laundry mat (conveniently also his grandma's house, haha!) and i will be drawing some serious plans for the upcoming weeks. So, continue to read through this slouch of laziness. Today should be a bit better for you, I hope.
DESIGNNINNGG!
Anybody with a little excitement in their bones can't stand looking at white walls, towels, and everything plain. Today, because the week theme is Strawberry, we're going to design the Kitchen.
The Kitchen is a room full of appliances, and some very big expenses so remodeling can get really costly. Sprucing up the walls with a nice color paint, and a quaint theme can put your eyes at ease. The key is to know what your needs are. I'm very big into color as well, so white kitchens are a must not for me. Better Home's has an awesome program that lets you see and test out a perfect kitchen palette; check that out here.
Other important decoration points;
Windows. It's the summertime! I don't have to tell you that though. There are tons of fun activities, flowers blooming, bees buzzing and birds a-humming, that you're going to want to see outside your windows while washing those dishes. Take down your curtains, and spruce your window up with a cute strawberry fabric in the form of a valance!
Ohhh, that smell. Aroma is very important in the kitchen, and with a wide variety of strawberry candles, incense, etc. you'll be good to go. Here is a beautiful soy candle on Etsy, and of course there are tons of them to look through if you just search.
Cabinets. There are many ways to spruce up a cabinet and not rip the whole thing down. There are loads of adorable knobs all over; here is one for our theme. You can almost find any kind of knob you want. You can also line it with cute contact paper like this.
Below are some cute items that I dug up for you guys.

Other ideas you want to keep in mind is this theme is very country. So, if you wanted to stick with this theme, you could also use country artifacts to blend in with the strawberry collection.
In addition to all of the above, here are a few other ideas for you to spruce up with your strawberry theme. You can get some chair covers, matching magnets, teapots, cups, dish sets, and more. Top this with a nice warm strawberry rug to dig your toes into and you'll be looking at a mighty fine, mighty strawberry kitchen!
Let's face it. Designing strawberry kitchens isn't the chic of chic, but there are some very cute products that can put a splash of summer into your winter as well. Not into the whole theme? Think about grabbing a cute drainer like pictured above.
See you guys tomorrow!
I'm going to show you what I've been working on and show you how to make a few interesting things! Personal crafts/tutorial day is going to be my favorite!
I want it all, and I want it now.
Wow, I'm getting old. I stayed up until five this morning, and I just don't feel today like I used to a year ago. No good, my friends. It was all in good fun though, a few beers, a few rockband songs, -- the good stuff.
Today I've got some patterns for you! Of course, they're in our fun summer Strawberry theme! I hope they inspire you to create some magical things. I know I got feeling creative with them!
First up;
A Strawberry Needlebook pattern ;; good, no - GREAT for gifts
Mini Strawberry Felt pattern ;; these are adorable! it suggests stuffing with wool, but i suggest stuffing it with some smell good stuff for an adorable collection of satchels :]
Strawberry booties; this is a knit pattern. these are for the lucky few with small babies, or friends with small babies. These little booties are absolutely adorable! i must find my knitting needles :[
I know you guys are super excited for some design lessons tomorrow! Oh come on. Designing with strawberries? Summer perfection! :]
See you guys tomorrow.
I've got a cigarette with my name on it, than a bed + remote calling me.
Monday, June 14, 2010
don't want no paper gangstah
Hello. Aloha. Bonjour.
Did you get your paper today? :]
Well, in any case - it's paper Tuesday!
Let's jump in to our strawberry themed day.
I'm having a very hard time picking and choosing items to show. Everything about stationary and paper goods make me ecstatic! I can't even tell you, haha.

[from top left to right; Strawberry Blank Inside - Pack of 8 - 26.00 (price is insane, cards are cute!) Strawberry Mini Thank You Cards - Set of 12 - 6.00 Red Strawberry & Green Apple Cards - 5.00 Vintage Inspired Strawberries Card - 3.00

[from top left to right; Mini Oval Scallop Tags - Set of 12 - 1.95 Set of 12 Strawberry Stickers/Envelope Seals - 1.25 Strawberry Die Cuts 1.50 Summer Strawberries Cupcakes Toppers - Set of 12- 14.00

[frop top left to right; Strawberry Shortcake - Upcycled Album Jacket SKETCH book - 9.99 Strawberry cahier journal - 6.00 Homegrown Spiral Notebook - 12.00 Mini Notebook - Cath Kidston Strawberries - 7.00
That's it for my collection of strawberry paper goods. I've got some awesome goodies for tomorrow, and some even better things I've made this week coming up later in the week!
We might go just you and me to pick wild strawberries together.
Today is a special day, because it starts the new set-up of the blog. This week is special, because it's all going to be themed around the same thing, to celebrate the coming of summer.
Strawberries! All week, all topics, all strawberries!
Let's jump into today's Theme day, which will be different every Monday. So don't get used to seeing the same set-up here!
Strawberries! All week, all topics, all strawberries!
Let's jump into today's Theme day, which will be different every Monday. So don't get used to seeing the same set-up here!
The garden strawberry was bred in France, in 1740. I didn't know this, and I would have never thought it was bred. Interesting! More importantly, the strawberry is my favorite fruit and goes well with my second favorite fruit - bananas!

Strawberry jewelry is precious. While there are thousands of selections, these are a few of my Etsy favorites. :]
[from the top, left to right; Strawberry and Cream, Jelly Roll Cake Adjustable Ring; 6.50 Pink Strawberry Necklace, Silver Chain - Sweet Lolita. 10.00 Red Silver Strawberry Leaf Earrings 14.95 Strawberry Stud Earrings. 4.00 ]

Now, I have curly, untamed hair. I'm still obsessed with all sorts of hair pieces. These are just tooo cute!
[from the top, left to right; Pink Puffy Strawberry Felt Flip 3.00 Strawberry Cutie Hair Bobby Pin Picks 6.99 Strawberry Ponytail Holders 5.00 Set of Two Red Strawberry Hair Clips 4.00 ]

[from the top, left to right; Pink Pillow with Strawberry Applique 22.00 Cute Fabric Strawberry Garland 12.50 Strawberry Magnets 5.50 Ceramic Vintage Style Strawberries Sign 22.50]
I'd also like to make a small statement on Etsy and why I choose to link their merch. There might be times in the future that I link items that are on other websites, besides Etsy - but they will be few and far between. These ladies and gentlemen work hard to bring their crafts into the world, and I like featuring items from "nobodies." Some of the kids pay for college, some of them pay bills, raise children, live life - all on what they make crafting.
Of course, don't feel like you have to buy - be inspired too! Got extra red felt and some ribbon? Make your own hair doohickey! (Yes, that's so a word.)
See you guys tomorrow! I've got a homemade smoothie to finish. Yum!
Sunday, June 13, 2010
and you ain't got the heart, to finish what you started.
Aloha from the depths of whatever I have been doing.
(Reading, working, 360ing)
Big news, big changes!
Let's start with an explanation on resolutions. I don't make them on New Years. I'll never keep them; I do make them on my birthday, because what better motivation is getting old? Today is my birthday! Happy birthday to me! My resolutions are as follows;
- update blog DAILY. oh yes, you heard me. every single day!
- bike five-seven times a week.
- save money! earn money!
- give up the grudge. oh, i meant cigarettes and mountain dew. or at least cut back. because, really. i'm not a quitter.
Here's what the plan is;
Monday; Theme!
Tuesday; Paper!
Wednesday; Freebie!
Thursday; Design! (most likely on a dime, because let's face it - sometimes, I don't even have that!)
Friday; tutorials/personal crafts!
Saturday; Cooking!
Sunday; Weekly round-up.
I would give you more details, but that would ruin the surprise. Since today is Sunday, my birthday, and in lieu of the fact I have NOT made a post this week; please stay tuned tomorrow for the start of good fun! :]
Thanks for reading, if you have.
I hope you guys are excited as I am to get into this. :]
(Also, keep a lookout for a new layout. I got some pencils, and paper out!)
Thursday, May 27, 2010
It's all the same, if everybody leaves her.
I would like to start this out with a little personal update. First, let's talk about growing up - because it's no fun. I wish I would have listened to my parents. I'm turning twenty three this upcoming month. Really, it's like two weeks. Things hit you like a brick. I'm twenty three. Twenty three! 23! two three. Holy shit.
In all of this aging stress, I've taken so many things and pushed myself to cross them off the list. I have a credit card bill, from when I was eighteen. I owe nine hundred bucks. I knew at the back of my mind, that this was true - but when I realized how old I was getting, and that in the NEAR future I would be looking to move out on my own completely (I mean, I live with roommates now, but that doesn't count.) So, I contacted my collections company and got all of that mess squared away to make payments on it. Yay!
I also applied to Oakland Community College. I'm going to go finish that associate's. My main goal is to grab an associates, and look for some small business grants. But, hell - that's the future, this is now.
Speaking of now, I got a car today! This is the first car I have had in three years, no four years - that was MY car. Not one that I share with my love. I have a car. I can't say it enough. I'm very excited.
MOVING ON;
Crafts. ABOUT those. Let's talk about them. I made things! Specifically, I made my brother a birthday present. A desk set which included a pen container and a mini bulletin board. I have step by step instructions to the bulletin board, which I thought was SUPER cute and very handy if you are low on wall space, haha.
Let's get started!

you are going to neeed;
- cork
- picture frame
- fabric
- glue (i used tacky, you should not, haha)
- paint (optional)
- pens
- scissors/razorblade

You can also have a cute kitty. This could not be avoided for me. He was VERY adamant about helping.

Take your picture frame. Take the back off, remove the glass and save it for a future project!

Use the back part to trace a shape on the cork.
 This is where the cat comes in. He will try and guide your pen in all sorts of crazy directions. Do not allow this to happen.
 Place the cut out cork into the frame, along with a cardboard backing. Close it up, just to make sure it fits.
 I was in luck. It really did fit.
 Track the fabric with allowance to wrap it up nice and neat.
 Wrap it up in the middle, like so. Glue in place, and than do this with the outer edges. Apparently my camera disappeared into the mess, because this is the last picture I took until the finished project;
 I trimmed off the mess, and in the end I think it looked really good. My brother didn't get back to me on whether he liked it or not, but you know.
This is a crappy phone picture of the complete set. :D Notice I put his initials on the board and on the other say of the container is a B as well as the apparent J. :D

Okay, that's it for me! I'm out of here.
The next update? It won't be so far away.
Just a few days, and will include some of the jewelry I'm making!
I hope everyone has amazing plans for memorial day weekend! :]
Monday, May 17, 2010
The Last Hour.
Well, hell. Today is a small update, for the most part. It includes;
- a small project
- pictures of my new craft box, with brand new stuff inside! :D
- pictures of some lame watercolors i did for my boring white walls
Get some colorful string, and a glue gun together.
This isn't string, per se. It's actually a flat ribbon-esque cro-sheen,
but anything would work. You'll be doing a lot of wrapping with plain string though.

Glue a dab of glue on the end, and place your material in it. Start a-wrappin'! It took me roughly twenty minutes to get all the way around.

Here's a closer picture of the wrapping process.

Keeep wrapping. When you get to the end, wrap it up nice and tight and glue it down.

Excuse the messs my hair/face is. This is the finished product!

Now I have an awesome headband, fixed up in my favorite color. It also happens to be the color of most of my clothes! Imagine! :]


Thursday, May 13, 2010
When it rains, it pours.
It's still raining. I don't know why I expected differently from May. All this means to you, is that my project is postponed yet again. I can't collect wood in the mud and rain. It's supposed to be sunny soon though. I'll probably head out tomorrow afternoon.
In the meantime, I wanted to share one of my obsessions. I will warn you, that things that capture my brain are weird, haha. I've been patiently waiting for my very own space to create something like this.
I discovered my first "Plate Wall" a few years ago. I was reading my usual design blogs, and stumbled across it. Ever since than I've been saving pictures and gathering ideas for my very own plate wall. I've thrown plates on a wall symmetrically, spewed all over, in a line, in a flower shape - all sorts of styles and plates have been used. Nothing ever looks right, for me. I have a feeling that it won't look right until it's in my house. So, I'll wait patiently for that.
In the meantime, I want to share my obsession. First, I want to show you a few of my favorite collections.


It's really cool, isn't it? Secondly, if you're interested in throwing together a plate wall - let's talk about your options.
Option number one. Buy new plates. There are lots of cool plates at stores like Urban Outfitters (Just so happens they have a great dish sale going on!).
Option number two. Hit up some antique shops, garage sales, flea markets. They have the coolest plates around. It's also a lot cheaper to buy pretty plates when they're so OLD they're toxic to eat on. Oh, don't things get GREAT with age?
Option number three. This one is my favorite. You can get plain white dishes for really cheap. Sometimes, even at the dollar store. Paint them yourself! This comes in handy if you are going with a theme, and are missing a few plates. Sometimes, you can just NEVER find what you are looking for.
I've found two tutorials to help you guys on your plate wall missions, should you choose to accept it.
Tutorial number one; This tutorial talks about how to arrange a plate wall, and just so happens to be from one of my favorite design blogs ever.
Tutorial number two; This tutorial is a short, and simple tutorial that talks about how and what you would use to paint a plate.
I promise homemade crafts next time I post, even if I gotta break away from my wood project. :] Silly rain. I hope everyone enjoyed my rave. It's got me motivated to start the final collecting stages for a perfect collection! Haha.
Enjoy your weekend, folks! You never know what will happen before the next!
Monday, May 10, 2010
Belated Mother's Day
Happy Belated Mother's Day!
I wanted to wait until yesterday night to post this, but I was so exhausted from staying up so late all weekend and working at ten a.m. Sunday. I'm doing it now though, and I hope everyone had a fantastic Mother's Day.
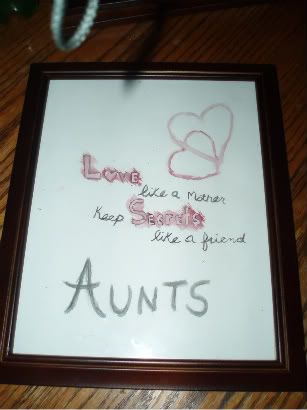
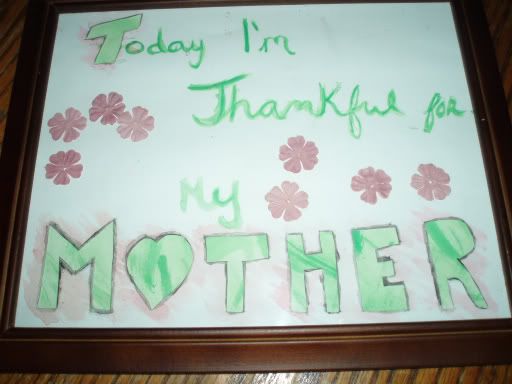
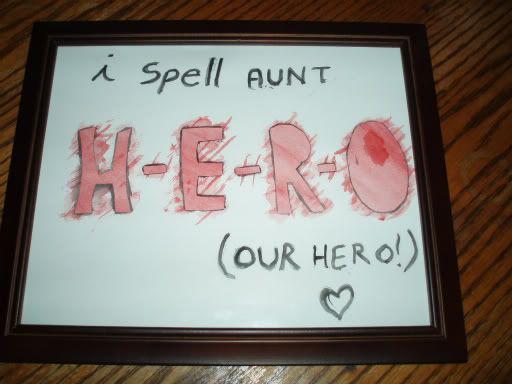
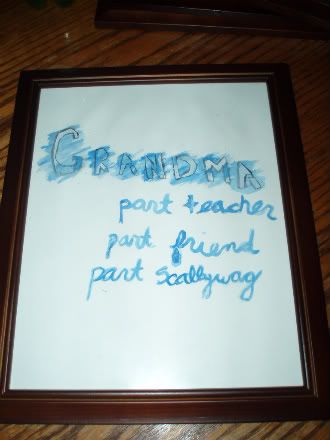
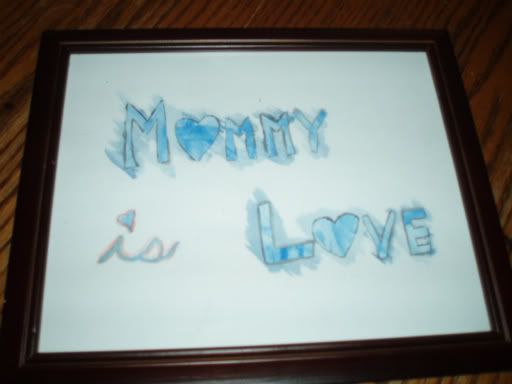
Today I'm going to share my homemade Mother's Day gifts.
These are sloppy, and not very well done. It's a very neat idea if you wanted to really put some effort into it and use acrylics or something.
Materials I used:
Cardstock
Frames
Watercolors
Paintbrushes
Xacto
Pencil & Newspaper
I only took pictures of the final outcome, but I'll give a short description on my process.
I penciled in the lettering, and put the cardstock on top of cardboard. I than cut the lettering out and threw it in the garabge bag.
I took a full sheet of cardstock and used a single color to paint the sheet. After it dried a little bit, I put in some darker lines around where I thought the lettering would line up. (Sometimes I was dead wrong, haha.) Than I painted the sayings on the front cardstock, and cut both sheets to side. Than, wahla! Put in the frame, close up - and you have a simple, cute, box.
Okay, okay. It took a little more than this. You really have to mess with it. I ended up not only putting black lines around the lettering, but also adding the backdrop color to the front sheet too. I'm bad at explaining things without pictures - I PROMISE that I will have pictures next time.
It is actually raining today, so I can't collect the wood for my next project until probably Thursday. So, look forward to a post than. :] The project is really cute, I think.
Happy Tuesday everyone!
Happy Tuesday everyone!
Subscribe to:
Posts (Atom)
